Overview
This technical application note describes how to set up the SG560 QOS Firewall Appliance as an IPSec VPN gateway for FacetPhone IP PBX. It also describes how to take advantage of the Quality of Service (QoS) bandwidth management features to maintain voice quality over the FacetPhone network. The following is included:
• Powering on the applicance
• Connecting
• Logging in and configuring
• Using QoS traffic shaping
• Enabling and configuring ToS prioritization
• Using the VPN solution
• Updating firmware
Powering on
1 Do not connect any Ethernet cables. Plug the 5V DC mini-plug into the back of the SnapGear appliance.
2 Plug the AC plug (the three-prong plug) of the power adapter into an electrical outlet.
3 After 25 to 30 seconds, confirm the unit is in factory default mode by resetting it. To reset, gently press the Erase button on the rear panel twice within three seconds, one second apart. The unit will reboot into the factory default mode.
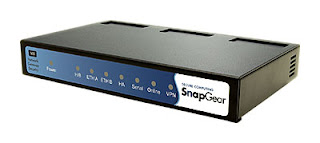
Figure 1 shows the SG560 after a reset, but before being connected to the network. All models front LEDs will start blinking green when in the factory default mode.

Connecting
To connect the appliance to the network:
1 Connect the supplied cable into Ethernet port A1 on the appliance.
2 Connect the other end of the cable to a PC or workstation Ethernet jack. The PC or workstation should have a Java-enabled Internet browser such as Microsoft Internet Explorer or Mozilla Firefox installed.
Logging in and configuring
To log in and configure the appliance, follow the process described in Table 1,
“Configuration sequence,” below.
Table 1: Configuration sequence

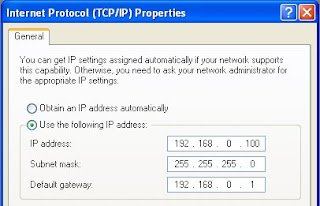
Configure the PC for IP address 192.168.0.100 by doing the following:
1 Select Start - Settings - Control Panel.
2 Double-click Network Connections.
3 Right-click Local Area Network, and then click Properties.
4 Select the Use the following IP address option, and then enter 192.168.0.100 in the IP address field.
The default gateway IP address is the factory default address of the SnapGear unit (192.168.0.1). DNS settings are not required at this time.
Note: Because the PC and the SnapGear are isolated during the initial configuration process, you can use any PC IP address in the range of 192.168.0.2 through 192.168.0.254.
Log into the unit by doing the following:
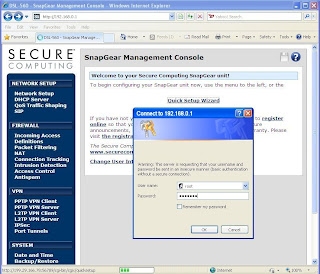
1 Enter http://192.168.0.1 into a Web browser.
2 Enter the default user name [root] in the User name field.
3 Enter the default password [default] in the Password field.
4 Click OK.

It is good practice to change the default root password.
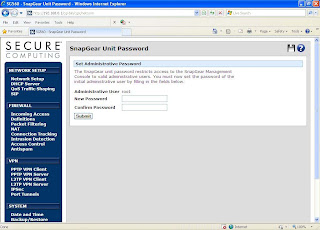
The SnapGear firmware automates this step after a reset:
1 Enter a new password in the New Password field.
2 The characters you type are masked, so you are required to enter the new password the same way twice to ensure it is changed as intended. Re-enter the password in the
Confirm Password field.
Note: This password will be required for all administrative access until additional administrative accounts are created. If forgotten before these accounts are added, the appliance must be reset to the factory default mode to regain access.
3 Click Submit.
To subsequently change the root password:
1 Click Users under the System menu.
2 Edit the root user. You can also create new administrative accounts in this area.

It is good practice to cable the Ethernet port B for Internet access prior to running the Quick Setup Wizard. The Wizard can auto-detect some circuit types if the port is cabled prior to completing the Internet steps.
1 Connect the other end of the Ethernet cable to the cable modem, DSL router, or other device supplied by the ISP.
2 Cable and power that device as instructed by the ISP.
---more coming soon---
Custom Firewall Rules:
iptables -t mangle -I TS -p 50 -j RETURN
iptables -t mangle -I TS -p udp --dport 4500 -j RETURN
Modification under advanced - configuration files - ipsec.conf
hidetos = no

No comments:
Post a Comment